| Back to Back Issues Page |
 |
|
October 2018 Trail Bytes: How to Dehydrate Ground Chicken & Turkey October 11, 2018 |
| Hello, I’m often asked if ground chicken and turkey can be dehydrated the same way as ground beef. Specifically, does the breadcrumb trick work equally well for poultry? The answer is yes; adding breadcrumbs to ground poultry before you cook and dehydrate it results in meat that rehydrates well in meals. The meat retains a pleasant chewiness; you won’t have to suffer through extremely tough meat like you will if the breadcrumbs are left out. Gluten-Free Alternatives: Ground oats or ground dehydrated chickpeas may be used in place of breadcrumbs, with excellent results. Work in ½-cup of either starch per one pound of ground poultry. Here's a chicken-flavored hummus recipe that can be ground up and used as the starch for dehydrating chicken: Chicken- Flavored Hummus Recipe Your chicken will turn out extra "chickeny." Better Safe than SorrySome folks dehydrate ground meat raw. They add seasonings with lots of sodium, squeeze the meat through a jerky gun onto dehydrator trays, and dry it at 160°F (70°C). While this is a time-honored method, there remains the possibility that pathogens in the meat may survive the dehydration process, especially if the dehydrator doesn’t run as hot as advertised.Precooking meat is the safer strategy. Poultry meat has a looser cellular structure than beef, so there are more spaces for pathogens to hang out in. For that reason, I cook it twice: first on the stove, and then in the oven. How to Dehydrate Ground Chicken & Turkey
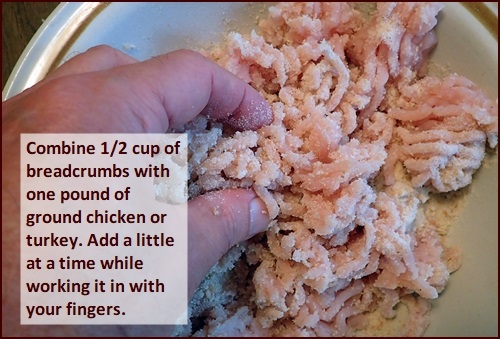
For each pound of ground poultry, add ½-cup of fine breadcrumbs or ground oats. Gluten-free breadcrumbs may also be used. I seasoned the breadcrumbs lightly with ¼-teaspoon each of salt, pepper, and ground cumin. If you want a bolder sausage-like taste, see this previous newsletter for a faux sausage spice blend. Work the breadcrumbs into the meat a little at a time with your fingers.
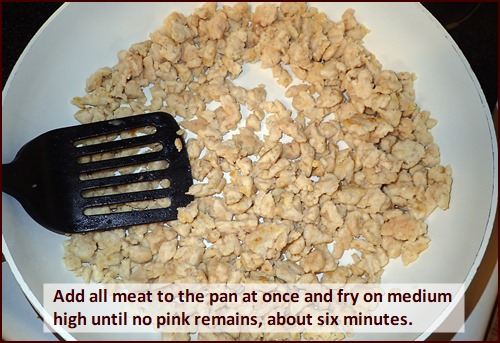
Lightly oil a non-stick pan with one teaspoon of cooking oil. Add all meat at the same time, and fry on medium-high for five to six minutes – until the meat is no longer pink. Stir and flip meat continuously with spatula, chopping any larger pieces in half. Some of the meat will brown lightly, which is a desirable trait.
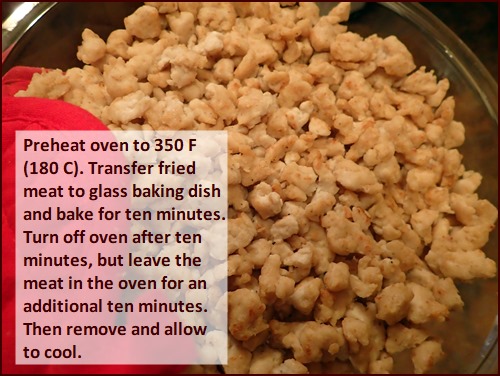
After ten minutes, turn off oven, but leave meat in there for another ten minutes. Don’t let any heat out by opening the oven door. After the total of twenty minutes in the oven, remove meat and allow to cool.
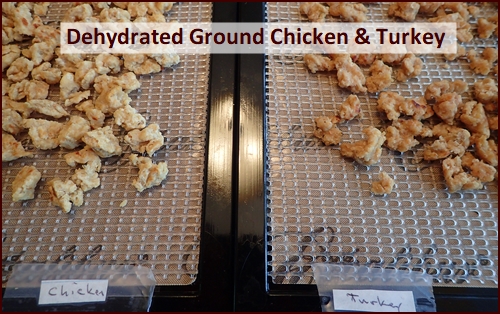
Dehydrate for approximately six hours at 145°F (63°C). Since the meat has been thoroughly cooked at a high temperature, there is no need to dehydrate at 160°F (70°C). In fact, that can lead to case-hardening, where the outside of the meat dries and hardens while the inside stays moist.
Read my Excalibur Dehydrator Review. Tip: If you look closely, you can see that I put the mesh sheets on top of, rather than under, the nonstick sheets. This improves air circulation around the meat, while the nonstick sheets still catch any small bits of dried meat that fall through.
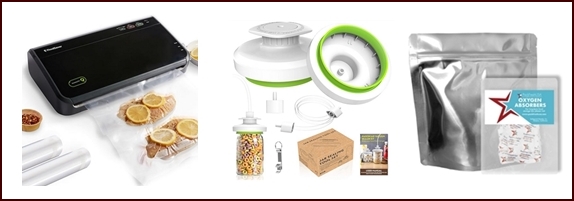
Storing Dehydrated Ground Chicken & TurkeyStore dried ground meat in an oxygen and moisture-proof container away from heat and light.I have stored properly cooked and dried ground chicken and turkey at home for up to a year in mason jars with oxygen absorbers enclosed, or in mason jars that are vacuum-sealed with a jar-sealing accessory. You can also store dehydrated ground meat in vacuum-seal bags, or in Mylar bags sealed with oxygen absorbers enclosed. Sealed bags may be placed in the freezer to extend shelf life even further. When taking dried food out of the freezer, allow the food to return to room temperature before opening the bag. Otherwise, condensation may form on the food. For trail or travel, I pack dehydrated meals in vacuum-sealed bags to continue the moisture and oxygen barrier. For short trips where moisture is not a big factor, Ziploc bags are usually sufficient. Explore More: How to Store Dehydrated Food & Pack Meals for the Trail. Dehydrated Food Storage Accessories
Trail Cooking & Food Drying Gear Guide
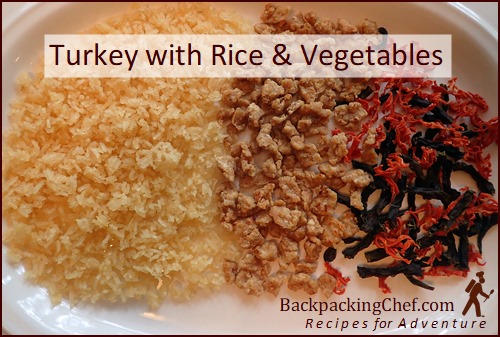
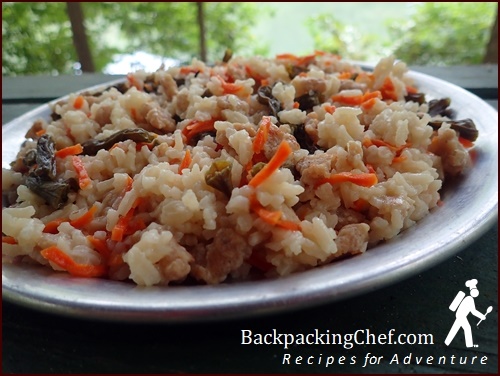
Turkey or Chicken with Rice & Vegetables
I had dried rice, carrots, and green beans on hand in vacuum-sealed jars dated May 2017. The rice had been precooked in fat-free chicken broth before drying. See Dehydrating Rice. 1 Large Serving Ingredients:
On the Trail: Combine dried ingredients with 1½ cups water in pot and soak for five minutes. Light stove, bring to boil, and continue cooking for one minute. Transfer pot to an insulating pot cozy and wait ten minutes. Thermos Cooking: Use 1¾ cups boiled water, a bit more than when cooking this meal in pot. Add boiled water to dried ingredients in thermos food jar in the morning, and enjoy meal for lunch in the afternoon.
How was it? Delicious. The meat was tender, and I always enjoy a simple meal the lets the flavor of the individual foods stand on their own, rather than be covered up with sauces. Add variety to your backpacking or emergency meal menus by substituting ground chicken or turkey for ground beef in any of my recipes. Are you Prepared?Before leaving Switzerland for my fall trip back to America, I dehydrated and assembled twenty-four meals for Dominique and Cédric to use for hot thermos lunches while I was away.With all of the natural disasters in the news lately, having a supply of ready-to-eat meals on hand brings peace of mind knowing we are also prepared in case of emergencies.
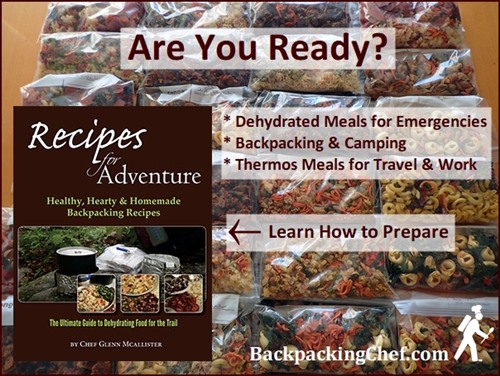
Use the free resources on the website, or buy my book, Recipes for Adventure to cover all your bases – emergency food, hot thermos lunches, and backpacking & camping meals. I love to hear success stories and see photos of packed rations, so feel free to share yours with me. Dominique arrives in Atlanta this afternoon, and that makes Chef Glenn a happy camper. See you next month.
Freundliche Grüsse,
Chef Glenn & Dominique P.S. If you have any questions or comments about this issue of Trail Bytes, please reply to this email or use the contact form at BackpackingChef.com. This project of dehydrating ground chicken and turkey is included in Recipes for Adventure II: The Best of Trail Bytes. 

If you received this newsletter from a friend and would like to subscribe (it's free), subscribe here. Visit my BackpackingChef Facebook page for the lastest posts. Be sure to "follow" the page to continue seeing posts.
|
| Back to Back Issues Page |