Guide to Dehydrating Vegetables
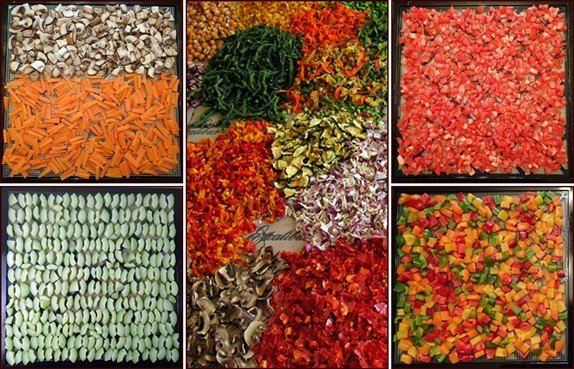
This comprehensive guide shows how to dehydrate vegetables. Dehydrating vegetables will make your trail and emergency meals more nutritious and colorful.
Tips for Dehydrating Vegetables
Bell peppers, tomatoes, mushrooms, and onions do not need precooking before drying them. All you have to do is wash them, cut uniformly and spread in a single layer on dehydrator trays.
Carrots turn a nice dark orange if steamed for six minutes before drying them. They retain their dark orange color in storage, while carrots dried raw turn pale.
Vegetables that you normally cook before eating, such as peas, broccoli, okra, and green beans will rehydrate better if you steam them for five to six minutes before drying them. Steaming corn for eight minutes before drying makes it more digestible in trail meals.
Lima beans rehydrate poorly, so avoid frozen mixed vegetables that include lima beans.
Dehydrating vegetables is a great way to supplement flavored rice and noodle products purchased in trail towns. Backpackers can add a ½-cup of dried vegetables to macaroni and cheese, ramen noodles, red bean and rice, and many more boxed food products to make more nutritious backpacking meals.

Photo above: Each 3 x 5 bag holds ½-cup of (l to r): Broccoli & Onions with Black-eyed Peas, Corn, Peas, and Ratatouille.
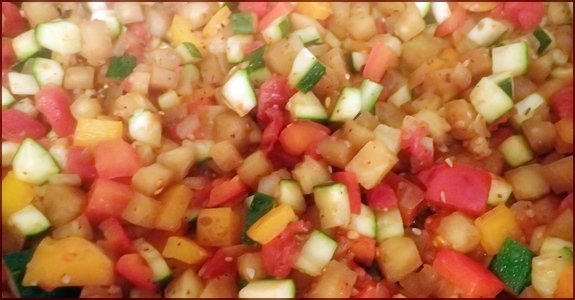
Cooking vegetables in a stew is another method of dehydrating vegetables. Recipes for Adventure features my Ratatouille recipe, which includes eggplant, onions, peppers, zucchini and tomatoes. I prepare it as a main meal or as the vegetable component in meals with meats and starches.
The vegetable drying times listed below are based on my experiences using an Excalibur dehydrator. Read my Food Dehydrator Review.
Dehydrating vegetables may take more or less time with other dehydrators because designs and wattage differ by manufacturer. Humidity also affects drying times so your results may differ slightly from mine depending on the time of year or where you live.
Dehydrating Vegetables–Raw
This section covers dehydrating vegetables that don’t need to be steamed first, including tomatoes, bell peppers, onions, mushrooms, zucchini, cucumbers, and spinach.
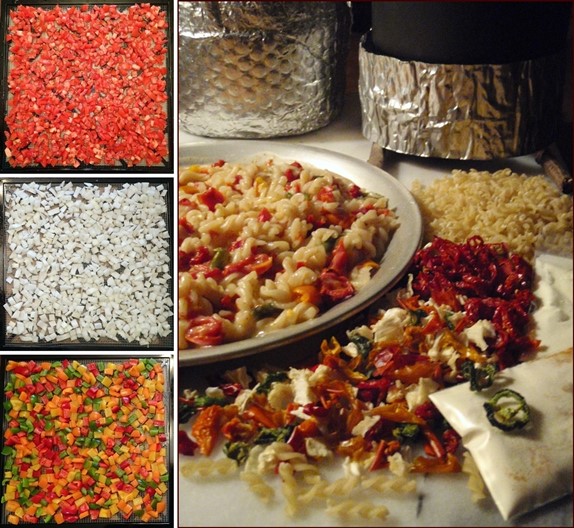
Most vegetables dried raw are diced or slices and spread in a single layer on dehydrator trays. The photo above shows dehydrated tomatoes, onions, and bell peppers rehydrated in Kickin’ Veggie Mac & Cheese.
Dehydrating Tomatoes
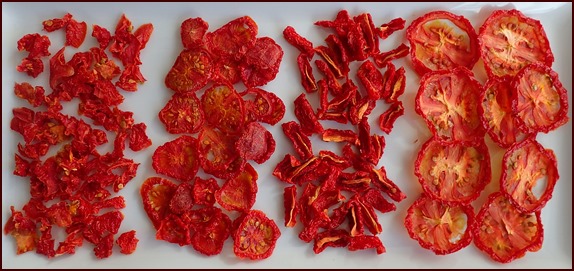
Plum tomatoes are excellent for dehydrating because of their meaty texture.
Slice
or dice tomatoes into something close to equal-sized pieces. Shoot for ¼-inch thick for slices, and ½-inch thick for
dices. There is no need to remove the seeds since the gel-like substance around
the seeds has health benefits.
Spread tomatoes out in a single layer on dehydrator trays covered with solid nonstick
sheets or mesh dehydrator sheets. Include the juices to maximize the
nutritional value. Shake a little seasoning salt on the tomatoes if desired.
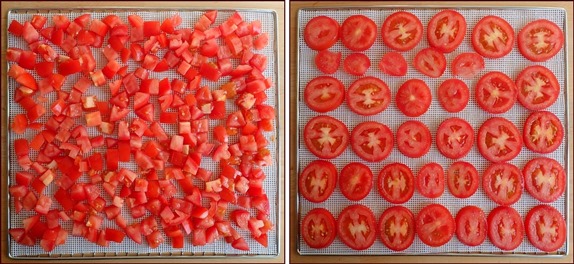
Dehydration times for tomatoes will vary depending on the juiciness of the tomatoes, the total load in the dehydrator, the thickness of the tomato pieces, the quality of the dehydrator, and the external humidity in the room.
Dehydration will also be faster if the tomatoes are dried on a nonstick mesh sheet rather than on a solid nonstick sheet or tray.
Dehydrate tomatoes at 135°F (57°C). Drying time will be in the range of eight to sixteen hours, possibly longer for thick cut tomato halves. Dried tomatoes are leathery, but thin slices may be snappy when dried.
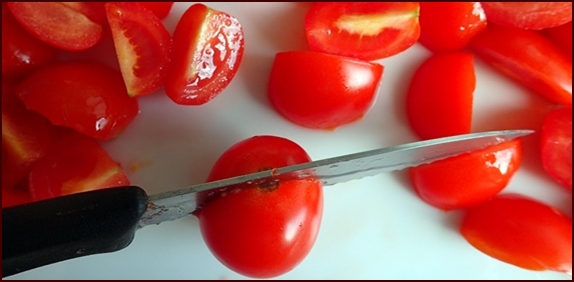
Cherry tomatoes can be cut into quarters or halves. They can also be cut into thin slices. Dehydrate in a single layer on nonstick mesh sheets. For half-cut tomatoes, dry them with the cut side facing up.
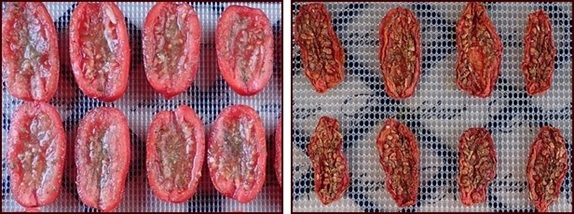
San Marzano tomatoes, with their oblong shape and meaty texture, are ideal for drying in halves. Each tomato half can be seasoned for intense flavor. They have a chewy texture like jerky. They're great for snacking on.
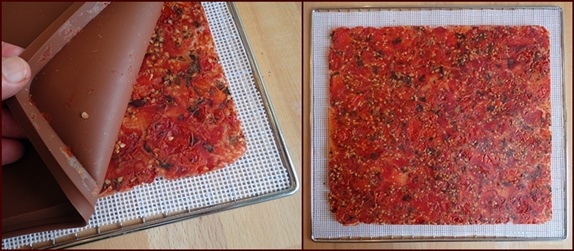
You can also dehydrate cooked tomatoes with added herbs, as shown in the above photo.
You'll find all the recipes and instructions on the Guide to Dehydrating Tomatoes page.
Explore:
Dehydrating Tomatoes | 7 Ways to Slice, Dice & Season Them
Dehydrating Bell Peppers
Take advantage of the color possibilities of bell peppers to brighten your meals. Wash and cut peppers into ½” pieces, trimming away the white fleshy part on the inside.
Place cut bell peppers on dehydrator trays in single layer with the skin side down and dehydrate at 125°F (52°C) for approximately six to eight hours.
Jalapeño Peppers
Wash peppers and cut into rings crosswise. The fleshy inside part and seeds can be removed or included for more heat. Dry in a single later at 125°F (52°C) for approximately six hours.
Use with caution as the heat concentrates in the dried pepper. Use two to three slices per serving in meals where you want some heat.
Dehydrating Onions

Peel off outer layer and dice onions into pieces about a ½" long. Separate any layers stuck together and spread out in a single layer on
nonstick mesh dehydrator sheets. Dehydrate at
135°F (57°C) for 8+ hours. To shorten drying time, onions may be dried at 145°F (63°C) for the first two hours. Move the onions around every couple of hours to speed up drying. Dried onions will be pliable, but dry to the touch.
You can dehydrate caramelized onions and green onions, too. Dehydrated caramelized onions add a sweet and savory flavor to backpacking meals. For complete instructions...
Explore: Guide to Dehydrating Onions
Dehydrating Mushrooms

Baby bella or small white mushrooms are good sizes to dry. Wash the dirt off in cold water, cut off the ends if hard or brown, and cut mushrooms into ⅛ inch thick slices.
Place on the dehydrator tray in a single layer and dehydrate at 125°F (52°C) for six to eight hours until dry and leathery.
Mushrooms absorb flavors well. To make savory mushrooms, heat 1 cup of water with a ½ cube of beef or vegetable bouillon in a pan. Bring to a boil and then remove from heat. Add one pound of sliced mushrooms to the broth and stir around for a few minutes. Savory mushrooms take about an hour longer to dry than uncooked mushrooms.
Another option for adding flavor to mushrooms before drying them is to stir in a teaspoon or two of soy sauce or Worcestershire sauce to the sliced mushrooms.
Dehydrating Zucchini
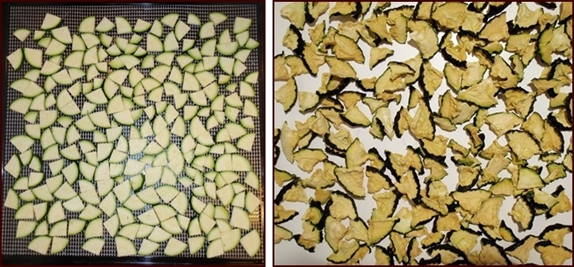
Wash zucchini and remove any dark spots on the skin. It is not necessary to peel zucchini before drying. Zucchini is tasty in a meal combined with tomatoes, mushrooms and onions. For use in meals, cut zucchini into ⅛ inch thick slices and then cut the slices into quarters. Skip the quartering if drying zucchini into chips for snacking.
Dehydrate at 135°F (57°C) for eight to nine hours.
There's a lot more you can do with zucchini: Cutting it into different shapes like chips and noodles; drying it raw or steamed; dehydrating zucchini soup powder; and making recipes like zucchini casserole, ratatouille, zoodles & beef, and pasta with zucchini in tomato sauce. For all the instructions...
Explore: Guide to Dehydrating Zucchini.
Dehydrating Cucumbers
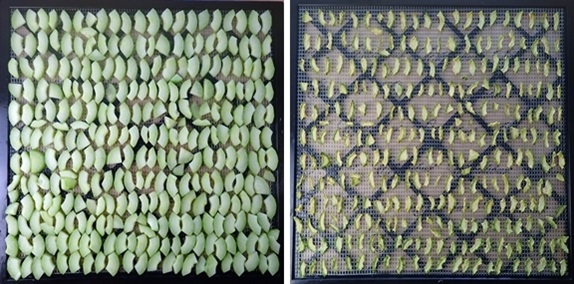
Dried cucumber chips are fair for snacking. If cucumbers have a thick waxy coating, peel first and then cut into ⅛-¼ inch thick slices (½ cm). If the cucumbers have large seeds, cut the cucumbers into quarters longwise, scrape out the seeds, and then slice crosswise. Arrange in a single layer and sprinkle with salt if desired.
Dehydrate at 135°F (57°C) for eight hours if you want them crispy like a chip, or at 125°F (52°C) for six hours if you want them chewy.
How can you use dehydrated cucumbers in meals?
Try this cold-soak salad recipe: Sushi Rice Bowl.
Dehydrating Spinach

Dried spinach tastes great in pasta or rice meals with tomato or cheddar cheese sauce. It combines well with beans and lends a nice flavor to soups and scrambled eggs. Choose fresh spinach without any dark mushy spots. Wash leaves and pat dry with paper towels. There is no need to trim the stems.
Spinach leaves take up a lot of space on the dehydrator trays, so start off with the spinach doubled up in two layers.
Dehydrate at 125°F (52°C) for approximately four to six hours. After two hours the leaves will have shrunk enough to spread them out in a single layer. Place a mesh sheet over the spinach leaves when they are half dry because they may start blowing around.
Dehydrating Sauerkraut
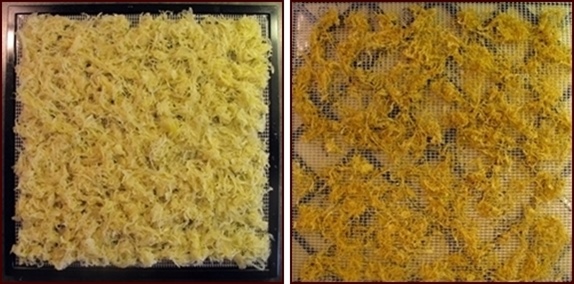
Dried sauerkraut adds a nice little zing to backpacking meals and goes well with ramen noodles in recipes like Noodles & Kraut. It can even be snacked on dry. Drain liquid and spread out on dehydrator tray.
Dehydrate at 125°F (52°C) for approximately four to six hours until crispy. Stir once or twice.
Dehydrating Vegetables–Steamed
Carrots, green beans, and broccoli, hold a darker color if they are steamed before drying. They rehydrate well in trail meals with minimal heating, and they make the meals more festive.
Dehydrating Broccoli & Cauliflower
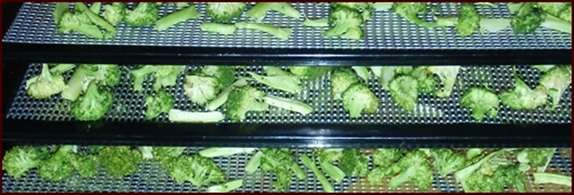
Rinse broccoli to remove any grit. Cut the florets into smaller ½” bouquets. The stalks may also be dried, but they tend to turn brown during dehydration. Cut half of an inch off the bottom and peel and discard the outer layer of the stalk. Cut the stalk crosswise into three sections about an inch to an inch and a half long. Turn each section on its end and cut down into four or five rows. Rotate a quarter turn and repeat, so you end up with rectangular strips. Steam the broccoli for six minutes to bring out the dark green color of the florets.
Place a nonstick sheet on the bottom tray to catch any dried pieces of the florets that may fall through.
Dehydrate at 125°F (52°C) for approximately eight hours. Dehydrated broccoli and cauliflower will be brittle when done.
Dehydrating Carrots
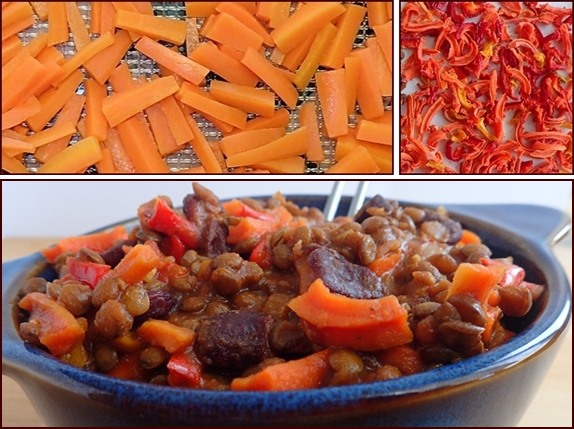
Photo above: Stick-cut, steamed carrots, dehydrated and rehydrated in Green Lentil Stew, one of the recipes in Recipes for Adventure II.
The stick-cut: Peel carrots and cut into 1½–2 inch long pieces (4–5 cm). Turn each cut carrot piece so that a cut end is facing up. Make two to four slices down the carrot, depending on carrot thickness, then rotate the carrot a quarter-turn, holding the first slices together, and slice down again two to four times. It’s not hard once you get the hang of it.
Carrots may alternatively be cut crosswise into ⅛-inch thick coin shapes.
Steam carrots for six minutes. They will hold a darker orange color after dehydration compared to carrots that are dried raw.
Once carrots are cool enough to handle, spread directly on mesh sheet of dehydrator tray.
Dehydrate at 125°F (52°C) to 135°F (57°C). Estimated drying time: 6–10 hours. Dried carrots will be pliable like leather.
Dehydrating vegetables is very efficient with an Excalibur dehydrator. You can fit more dried vegetables on each tray.
Dehydrating Corn on the Cob
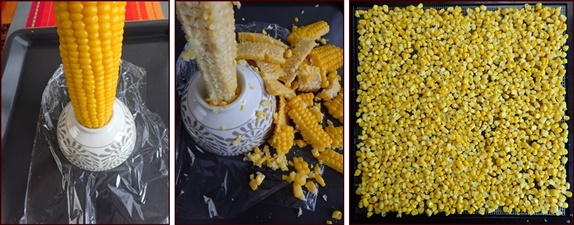
Dehydrating frozen corn is covered further down the page. If you want to learn how to dehydrate corn on the cob, I have a whole page on the topic, including how to precook it, dry it, use it in meals, and grind it into cornmeal.
Explore: Guide to Dehydrating Corn.
Dehydrating Green Beans
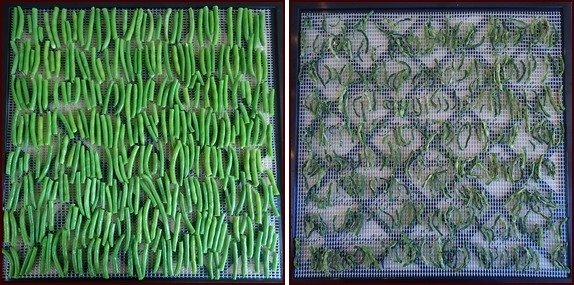
Pick or purchase green beans that are not too fat and fibrous. Wash and dry green beans. Cut off the ends and cut beans into 1-inch to 2-inch lengths. Steam for six to eight minutes before drying.
Spread in a single layer on dehydrator tray and dry at 125°F (52°C) for approximately eight hours. Dried green beans will be hard. If drying frozen green beans, you will find that French-cut green beans rehydrate faster and are less chewy in a meal than regular-cut green beans.
Dehydrating Okra
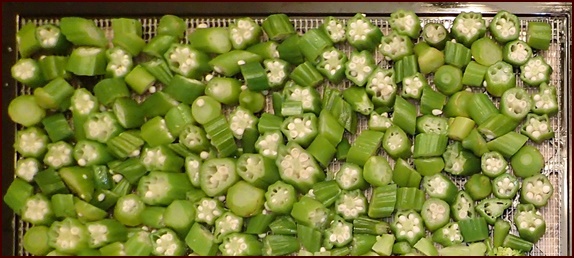
Cut okra crosswise into pieces ½-inch thick. Out of season, frozen okra is convenient and comes already cut. Steam okra for six minutes.
Remove okra from pot and allow to cool. Once cool, spread directly on mesh sheets in a single layer.
Dry at 135°F (57°C) or 125°F (52°C) for approximately six to eight hours.
Dehydrating Potatoes
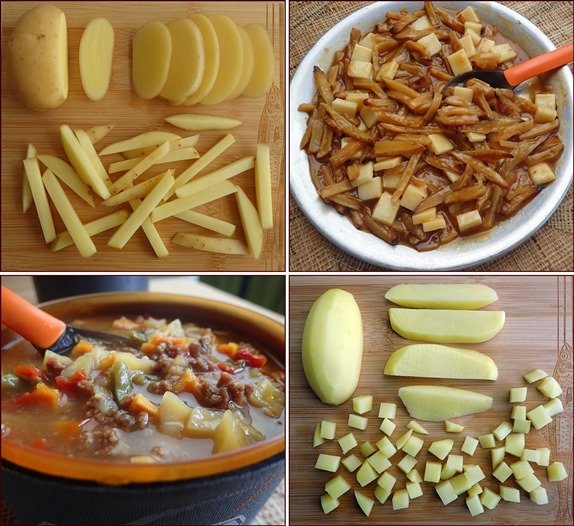
Peel potatoes (optional) and cut longwise into halves for small potatoes or quarters for large potatoes. Slice crosswise ⅛-inch thick like scalloped potatoes or dice into ⅜-inch cubes.
Steam for 6 minutes. Cool in a bowl of cold water, then place on dehydrator tray in single layer. Apply salt if desired. Dehydrate at 135°F (57°C) for 6 to 8 hours. Potatoes will be hard when dry.
Explore: Guide to Dehydrating Potatoes
The guide shows how to select, prepare, and cook potatoes before drying them. You’ll learn how to dehydrate potatoes by cutting them into cubes, thin slices, and French fry shapes, as well as how to dehydrate mashed potatoes, grated potatoes, and potato skins.
Dehydrated potato recipes include French Fries & Gravy, Potatoes au Gratin, Vegetable Beef Soup with Potatoes, Grated Potatoes & Chili, Mashed Potatoes with Meat & Vegetables, Cheesy Cream Potatoes & Chili, and more.
Dehydrating Vegetables–Frozen
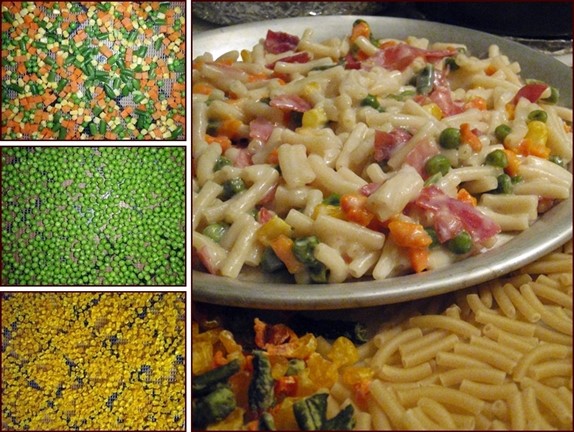
Photo above shows dehydrated frozen mixed vegetables in Ham & Cheese Macaroni.
Frozen vegetables are available year round and save time in the kitchen because they require little or no trimming before drying. Frozen mixed vegetables, corn, peas, broccoli, green beans, and okra all dry well.
While you can dry frozen vegetables without precooking them, they will hold their color better if you steam them for six to eight minutes first. They will also rehydrate better in dried meals.
Spread vegetables in a single layer on dehydrator tray and dehydrate at 125°F (52°C) for approximately six to eight hours.
Tips for Drying Frozen Vegetables:
When drying mixed vegetables, snap the green beans in half so they finish drying at the same time as the carrots, corn and peas.
French-cut green beans are less chewy in meals than regular cut green beans.
Lima beans remain hard when rehydrated in meals, so use mixed vegetables without them.
Peas shrink a lot when dried, so dry larger peas, not the petite size.
Dehydrating Vegetables–Canned
Dehydrating Beans
Beans are actually legumes, but I'm including them here with the vegetables.
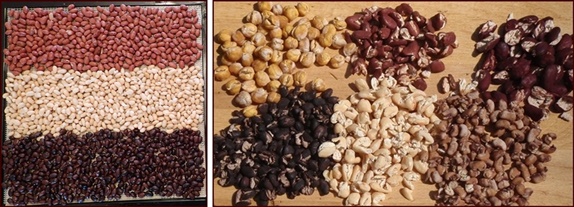
Drain and rinse canned beans. Place directly on dehydrator trays without nonstick sheets.
Dehydrate at 125°F (52°C) for six to eight hours.
Drying canned beans saves time compared to cooking the beans yourself, and the beans rehydrate well in meals. They usually split open while drying. This helps with rehydration.
If you want to cook dry beans instead of using canned beans, soaking and pressure-cooking them will produce beans that rehydrate well with far fewer beans splitting open when dried.
Learn more about dehydrating beans on my bean page:
- Cooking & Dehydrating Beans.
- How to Make Bean Bark.
- Dehydrating Edamame Beans.
- Recipes with Dehydrated Beans.
Explore: Guide to Dehydrating Beans & Bean Bark
Dehydrating Beets
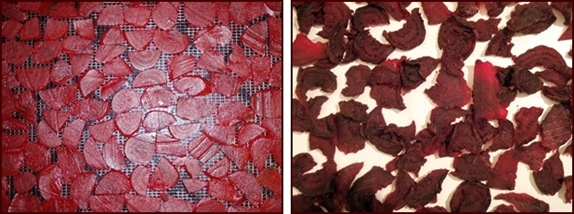
I prefer dehydrating vegetables that are fresh or frozen, but because it takes a long time to cook fresh beets, and I don’t use them as often as other dried vegetables, I save time and dry canned beets. They rehydrate well in meals paired with any combination of dried meats and rice.
Choose sliced beets for even drying. Cut any large slices into halves or quarters so that all slices are about the same size. Spread in a single layer on dehydrator trays and dehydrate beets at 135°F (57°C) for eight to ten hours.
Storing Dehydrated Vegetables
If you are dehydrating vegetables to include in meals for a trip that will occur within a month, then storing the dehydrated vegetables in Ziploc bags is sufficient until you are ready to assemble the meals. Keep the dried vegetables away from heat, light, and moisture. Oxidation, which degrades the quality of dried vegetables over time from exposure to air, will not be a factor in the short term.
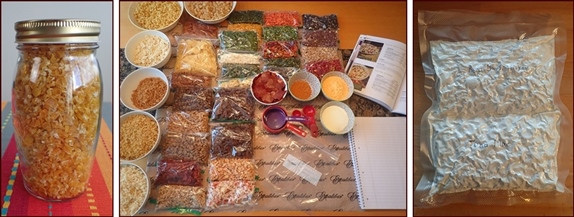
When storing dehydrated vegetables for longer than a month, then glass jars with tight-fitting lids are a good choice. Use the smallest-size jars to hold the food, so that the maximum amount of air will be displaced. Use a 50-cc absorber for half-pint jars, 100 cc for pint jars, and 300 cc for quart jars. I just use 100-cc absorbers and use more than one for larger jars. If you own a FoodSaver vacuum sealer, another option is to use their wide-mouth jar sealing accessory, eliminating the need for oxygen absorbers.
Once you assemble your dehydrated meals, vacuum sealing will protect the food in transit. For a trip of short duration, enclosing two or three dehydrated meals inside a larger Ziploc bag is sufficient, but vacuum sealing provides the best level of protection, especially for canoe trips and longer thru-hikes.
Explore: Packing and Storing Dehydrated Food.
Using Dried Vegetables in Meals
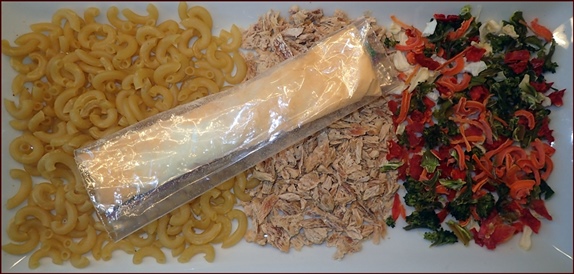
Use one dehydrated vegetable in a backpacking meal or combine several of them. Tuna Mac Casserole (shown above) tastes just as good with a medley of dried corn, carrots, and green beans, as it does with just peas or diced tomatoes and mushrooms.
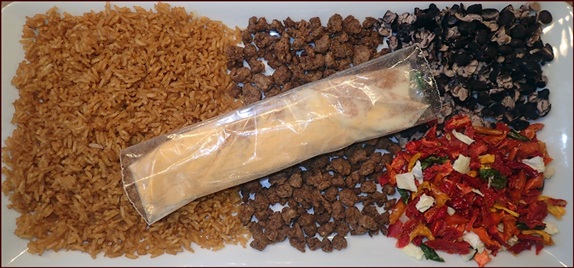
Mexican Beef & Rice includes dehydrated tomatoes, onions, and peppers. Learn how to dehydrate vegetables, meats, and starches; and assemble them into thirty-one meals like those shown above.
Explore: The Action Guide: Dehydrating 31 Meals.

In Recipes for Adventure: Healthy, Hearty & Homemade Backpacking Recipes, I devote a whole section to dehydrating vegetables which includes the dried yields for all vegetables used in the recipes. It will help you estimate how many cups of dried spinach you will get from one pound of raw spinach.
The recipes in the book suggest my favorite combinations of vegetables to use, but allow you to substitute whatever vegetables you like.
Testimonial: "I love how this book covers the pieces of the recipes and then how to put them together for meals. Great book for planning and learning how to concoct meals from your dried goods." –Jason

In Recipes for Adventure II: The Best of Trail Bytes, I show more ways to incorporated dehydrated vegetables into meals, and a chapter with many vegetable soup recipes.
Explore More...

Dehydrating Fruit: Apples, Pears, Bananas, Pineapples, Peaches, Strawberries, Mangoes, Oranges, Berries & More.

Dehydrating Meat: Beef, Chicken, Ham & Seafood.
Dehydrating Food A-Z Table of Contents: Vegetables, Fruits, Meats, Sauces, Barks, Soups & Dog Treats.
Share this page with friends on social media.
Free E-book & Newsletter
Free with Trail Bytes subscription.
