Guide to Dehydrating Food
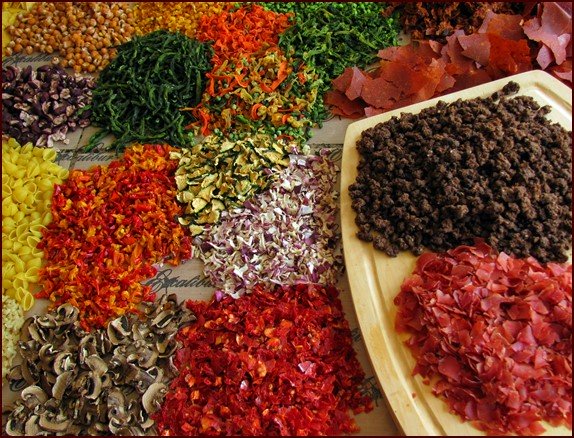
Welcome campers. Chef Glenn here. I’ll be your guide into the exciting world of dehydrating food. This page is the trailhead to adventures which start in your kitchen and end with delicious, homemade meals by a campfire, all made with dehydrated food.
You’ll need snacks along the way, so I’ll be with you, step-by-step, exploring the fruity side of food dehydration, too.
Grab a spoon, pick a topic, and let’s get started!
- Instructions for drying foods presented alphabetically from apples to zucchini, with temperature and minimum time settings.
How to Dehydrate Food by Category
- Meats & plant-based proteins, vegetables, and fruits.
Tips & Techniques for Dehydrating Food
- Choosing and using a food dehydrator.
- Foods not good for dehydrating.
- Storing dehydrated food for long shelf life.
Times & Temperatures for Dehydrating Food
The A–Z Guide to Dehydrating Food lists recommended temperatures and minimum drying times for foods listed in alphabetical order.
The actual times it takes to dehydrate foods can vary by several hours depending on variables such as the quality of the dehydrator, the amount of food in the dehydrator, the thickness of the foods, and the humidity in the room.
Guide to Dehydrating Food from A–Z
Click on the food name and explore the many ways that you can dehydrate and use it in dehydrated meals, snacks, and desserts.
| A | B | C | D | E | F | G | H | I | J | K | L | M | N | O | P | Q | R | S | T | U | V | W | X | Y | Z |
 |
135°F / 57°C, 8+ hrs. |
 |
135°F / 57°C, 11+ hrs. |
 |
135°F / 57°C, 6+ hrs. |
 |
135°F / 57°C, 8+ hrs. |
 |
125°F / 52°C, 6+ hrs. |
 |
135°F / 57°C, 8+ hrs. |
 |
125°F / 52°C, 4+ hrs. |
 |
135°F / 57°C, 8+ hrs. |
 |
125°F / 52°C, 4+ hrs. |
 |
135°F / 57°C, 8+ hrs. |
 |
125°F / 52°C, 6+ hrs. |
 |
145°F / 63°C, 6+ hrs. |
 |
125°F / 52°C, 5+ hrs. |
 |
125°F / 52°C, 6+ hrs. |
 |
145°F / 63°C, 6+ hrs. |
 |
135°F / 57°C, 8+ hrs. |
 |
135°F / 57°C, times vary. |
 |
145°F / 63°C, 6+ hrs. |
 |
135°F / 57°C, 8+ hrs. |
 |
145°F / 63°C, 8+ hrs. |
 |
145°F / 63°C, 4+ hrs. |
 |
135°F / 57°C, 6+ hrs. |
 |
135°F / 57°C, 11+ hrs. |
 |
135°F / 57°C, 18+ hrs. |
 |
125°F / 52°C, 8+ hrs. |
 |
145°F / 63°C, 6+ hrs. |
 |
145°F / 63°C, 6+ hrs. |
 |
135°F / 57°C, 10+ hrs. |
 |
115°F / 46°C, 12+ hrs |
 |
145°F / 63°C, 6+ hrs. |
 |
135°F / 57°C, 8+ hrs. |
 |
125°F / 52°C, 6+ hrs. |
 |
135°F / 57°C, 8+ hrs. |
 |
135°F / 57°C, 8+ hrs. |
 |
135°F / 57°C, 8+ hrs. |
 |
135°F / 57°C, 14+ hrs. |
 |
135°F / 57°C, 4+ hrs. |
 |
135°F / 57°C, 8+ hrs. |
 |
135°F / 57°C, 8+ hrs. |
 |
125°F / 52°C, 6+ hrs. |
 |
135°F / 57°C, 12+ hrs. |
 |
135°F / 57°C, 6+ hrs. |
 |
135°F / 57°C, 6+ hrs. |
 |
135°F / 57°C, 8+ hrs. |
 |
145°F / 63°C, 4+ hrs. |
 |
125°F / 52°C, 4+ hrs. |
 |
145°F / 63°C, 6+ hrs. |
 |
Temps. and times vary. |
 |
125°F / 52°C, 4+ hrs. |
 |
135°F / 57°C, 8+ hrs. |
 |
135°F / 57°C, 10+ hrs. |
 |
135°F / 57°C, 4+ hrs. |
 |
135°F / 57°C, 8+ hrs. |
 |
135°F / 57°C, 10+ hrs. |
 |
135°F / 57°C, 6+ hrs. |
 |
145°F / 63°C, 6+ hrs. |
 |
135°F / 57°C, 11+ hrs. |
 |
135°F / 57°C, 8+ hrs. |
How to Dehydrate Food
by Category
Dehydrating Meats & Plant Proteins
Dehydrating Meat: Ground Beef, Ham, Shrimp, Tuna, and Crab.
Dehydrating Chicken: Canned Chicken, Ground Chicken & Turkey, and Pressure Cooking Chicken.
Dehydrating Fish: 4 Ways to Cook & Dry It.
Dehydrating Tofu: Freeze it, flavor it, cut to desired shapes, and dry it. Page includes many backpacking tofu recipes.
Dehydrating Plant-Based Meat Replacements: How to cook and dehydrate Beyond Burgers with several recipes for complete meals.
Textured Vegetable Protein: How to use TVP in dehydrated meals.
Dehydrating Vegetables
Dehydrating Vegetables: Beans, Beets, Bell Peppers, Broccoli, Butternut Squash, Carrots,
Cauliflower, Corn, Cucumbers, Green Beans, Frozen Vegetables, Mushrooms,
Okra, Onions, Potatoes, Sauerkraut, Spinach, Sweet Potatoes, Tomatoes, and Zucchini.
Dehydrating Fruit & Fruit Leather
Dehydrating Fruit: Apples, Apricots, Bananas, Blueberries, Cantaloupes, Grapes, Lemons & Limes, Mangoes, Oranges, Peaches, Pears, Pineapples, Strawberries and Watermelon.
Dehydrating Fruit Leather: Applesauce and all kinds of fruits. Fruit Smoothies & Puddings. How to pack fruit leather.
Tips & Techniques for Dehydrating Food
Choosing a Food Dehydrator

- Review compares features and capacities of Nesco, Cosori, and Excalibur dehydrators.
Cosori Food Dehydrator Review.
- There's a lot to like about Cosori dehydrators, but read this review to make sure you order a different brand of nonstick trays and silicone sheets.
10 Tips for Using a Food Dehydrator
1. Rotate Trays
Since the fan and heating element inside a food dehydrator are in fixed locations, the air and heat flow may dry food on trays in some locations faster than others: top, middle, or bottom; left or right; and front or back. With square or rectangular dehydrators, rotating trays a quarter-turn or half-turn every few hours, as well as changing the position of trays from top to bottom, will even out and speed up drying. Rotating trays top to bottom is also helpful with round dehydrators.
2. Rearrange the Food
When a whole meal like chili or stew is substantially dry, pull the meal apart and redistribute it on the trays to expose more parts of the meal to airflow. Likewise, pull apart and redistribute rice, grated potatoes, and any food that sticks together.
3. Dry Extra Vegetables
When vegetables are cooked in stews, they lose some of their color and
texture. Include vegetables in the stews when you cook and dry them, but
dry extra vegetables separately. Add the extra vegetables to the dried meal when you
pack it for the trail, and you will enjoy more color and texture.
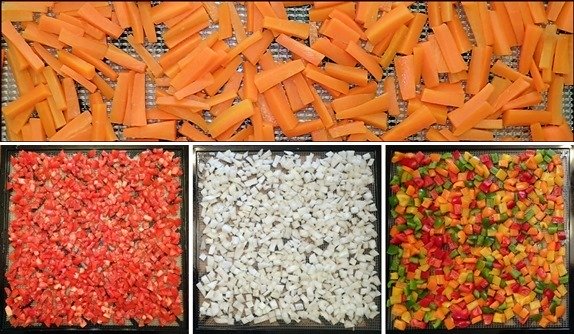
Steaming carrots for 6 minutes before drying them turns them a nice dark orange, whereas carrots dried raw turn pale. Broccoli, green beans, peas, and corn also hold their colors better if steamed before drying.
Explore: Dehydrating Vegetables.
4. Cut Food Uniformly and Not Too Thick
You don’t have to be precise when cutting fruits and vegetables, but if the pieces of food are similar in size, they will finish drying at the same time. After several hours of drying, tear any larger pieces of food in half. Fruit will dry faster, without risk of hidden moisture, if cut no more than a ¼-inch thick (½ cm). For foods you might dry in cubes, like baked sweet potatoes or butternut squash, shoot for cubes about ⅜-inch to ½-inch thick (1 cm).

5. Don’t Overload Trays
Spread food on dehydrator trays in a single layer. Too much food on trays will greatly increase the drying time. Spread blended foods like sauces as thinly as possible. For Excalibur Dehydrator trays, which have the highest capacity per tray compared to other dehydrators, 1 cup, or a little more, of blended food is the ideal quantity to spread on nonstick sheets. For meals like chili or stew, you can dry up to 2 cups on an Excalibur Dehydrator tray. As the food dries and shrinks, stir it around a few times.
6. Make Soup Thicker
If your soup has a lot of broth, remove some of the soup solids and run them through a blender. Then add them back to the soup. Cooked potatoes are especially useful for thickening soups.
Explore: Dehydrated Soup Recipes.
7. Invest in Nonstick Sheets & Trays
Although more expensive on the front end, nonstick dehydrator sheets and trays last
for years, and it’s much easier to spread blended foods on them than on
single-use parchment paper.

Photo: Dehydrating tomato sauce and diced tomatoes using nonstick silicone trays and silicone mesh sheets.
Explore: Nonstick Dehydrator Sheets & Trays.
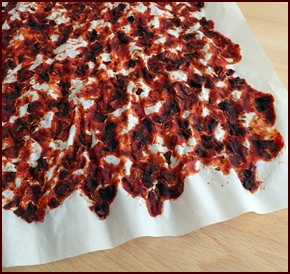
Photo: Dried tomato sauce on parchment paper.
Sauces, soups, starchy foods, and fruit leathers will stay flat on nonstick sheets, but with parchment paper, they will draw up the paper as they dry.
These blended foods can be easily removed from nonstick sheets, but they don't let go of parchment paper as well.
8. Flip & Peel

Photo: Fruit leather dehydrated on a nonstick sheet which is removed near the end of the drying process.
When blended foods like sweet potato bark, fruit leather, and tomato sauce are almost dry on nonstick sheets, flip them upside down and peel off the nonstick sheets. With the nonstick sheets removed, the increased airflow over the bottom side of the bark or leather will speed up drying.
9. Fruit Leather Packing
Fruit leather sticks to itself, especially when vacuum sealed. To avoid the difficulty of trying to pull it apart on the trail, fold up a single sheet of fruit leather in parchment paper.
Explore: Dehydrating Fruit Leather.

10. Keep a Notebook
Keeping a record of your food dehydration projects will save you time and ensure good results the next time you dry those foods.
List the preparation steps, ingredients, temperature setting, and the amount of time it takes for the food to dry.
Record the volume and weight of the food before and after drying it. Under "Starting Units," write down the quantity of the whole food before peeling or trimming. For example: 5 large apples, 6 medium bananas, 12 small onions. Under "Wet Quantity," write down the volume/weight of the food going into the dehydrator.
Lastly, make notes about mistakes—so you don’t repeat them!
Food Dehydration Project Sheets
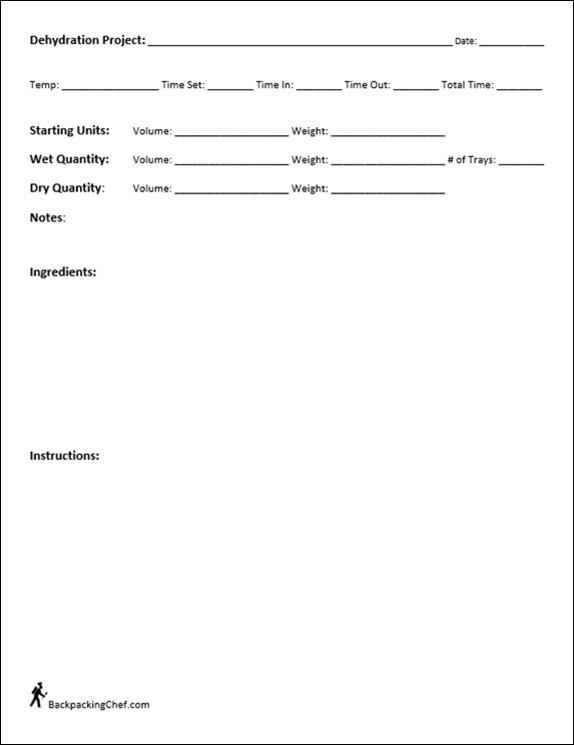
Print Free Food Dehydration Project Sheets
Organize project sheets by category in a notebook.
Soon you'll have your own DIY dehydrating food cookbook.
These
project sheets are what I use in the kitchen every time I dehydrate
food.
Print as many as you need.
What foods are not good to dehydrate?
Dairy Products
Due to the potential for spoilage during and after dehydration, dairy products—including milk, butter, cream, sour cream, cheese, cream cheese, and kefir—should not be dehydrated in meals. It is possible to dehydrate yogurt, but experience has shown that it can have a concentrated sour taste when rehydrated. Yogurt resists rehydration; it only absorbs about half the amount of water it contained before it was dried.
Dehydrated meals containing cream, cheese, or cheese sauces may end up with residual greasiness. Grease can obscure water moisture, which can lead to mold growth. If you take the risk of including dairy in dehydrated meals, store those meals in the freezer until you leave for your trip, and eat them the first night out on the trail.
Dairy products are available commercially in powdered form. Add them to meals when you rehydrate the meals on the trail. If you don’t mind carrying a little extra weight, a small block of hard cheese will last a few days in moderate temperatures.
Excessive Oil
A small amount of cooking oil is tolerable; keep it under 1 tablespoon in stew/chili-type recipes that will be divided into several meals, or leave it out. Storing dried food in airtight containers minimizes the risk of oils turning rancid over time. Check labels to ensure that store-bought sauces that you intend to dehydrate don’t contain a lot of oil.
Many backpackers carry a small plastic bottle of olive oil on the trail to add to meals for extra fat.
Coconut Milk
Coconut milk will leave a greasy residue in dehydrated meals and should not be used. Use powdered coconut milk and add it to dehydrated meals on the trail.
Fatty Meats
Like vegetable oil, animal fat can turn rancid over time. The safe practice is to minimize fat when dehydrating food, and to store dried meat in airtight containers. Only lean meat with fat content not exceeding 10 percent should be dried. Ground beef suitable for drying should be labeled 90/10, which designates the protein/fat content. Avoid ground beef sold as “hamburger,” which contains 20–30 percent fat. Ground chicken and turkey are usually low fat, but check the labels just to make sure. Pork is too high in fat to safely dehydrate and store, but precooked ham or Canadian bacon are usually lean enough for drying.
Uncooked Meats
To kill any potential pathogens that might be present in raw meat, beef should be cooked to a minimum internal temperature of 160°F (70°C) before dehydrating and poultry to a minimum internal temperature of 165°F (74°C). The temperature of most dehydrators will go up to 165°F (74°C), but the temperature of the food may be lower, due to the cooling effect of evaporation. Be safe and cook meat on the stove or in the oven before drying it.
Article from the USDA Food Safety & Inspection Service: Jerky and Food Safety.
Avocados
Trust me, this healthy-fat food that we love so much in a salad or guacamole, turns into a disaster in the dehydrator. It will turn brown from oxidation and won't rehydrate.
What about Eggs?
Despite having a high fat content, properly cooked and dehydrated eggs, such as the Omelet Bites featured in Recipes for Adventure II, will remain in good condition for months if stored in airtight containers. To be on the safe side, use dried eggs within 3 months.
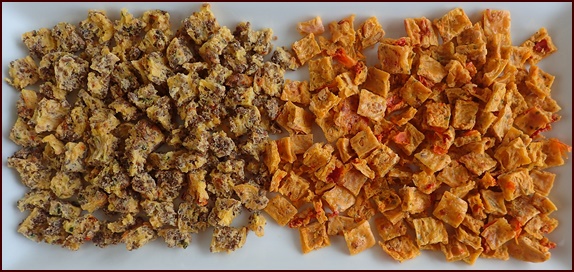
Photo: Sausage-seasoned ground beef omelet bites on left, and tomato and baked bean omelet bites on right.
Shelf-life of Dehydrated Food
Despite your best efforts, dehydrated food will not last nearly as long as freeze-dried food. A leading freeze-drying company states that their unopened products have a shelf life of 30 years. Freeze-drying removes close to 98 percent of the water in the food, which prevents oxidation and/or enzymatic activity from taking place.
Dehydration, on the other hand, removes between 80 and 95 percent of the water, depending on the food. While that’s dry enough to inhibit mold from growing—if the dried food is stored in airtight containers—oxidation and/or enzymatic processes will slowly proceed using the minuscule amounts of moisture or oxygen in the food or container.
How Long is Dehydrated Food Good For?
In my experience over many years, dehydrated food—when properly dried and stored—remains in very good condition for at least a year. Beyond one year in storage, a gradual decline in the food’s quality may be noticed. Some dried vegetables may get darker, while others may get lighter. Dehydrated corn is especially prone to turning brown over time, so try to use it up in 6 months and be sure to store it in an air-tight container using oxygen absorbers or vacuum sealing.
Best Practices: Dehydrating Vegetables
Steam blanching certain vegetables before drying them deactivates enzymes—which helps protect their appearance and taste during storage. Carrots, green beans, broccoli, and corn will all store better if steamed first.
Explore: Dehydrating Vegetables.
Best Practices: Dehydrating Fruit
Fruits with light flesh, like apples, pears, and bananas, may turn slightly brown due to oxidation. Dipping fruit in a solution of ascorbic acid (or lemon juice) and cold water reduces oxidation, though this step may be regarded as optional. A slight browning of fruit doesn’t significantly affect its sweet taste and nutritional value.
Explore: Dehydrating Fruit and Fruit Leather.
Best Practices: Dehydrating Meat
Oxidation may turn oils and fats rancid over time; that’s why we use only lean meats and minimal amounts of oil in dehydrated meals.
Explore: Dehydrating Meat.
Best Practices: Packing & Storage
Dry your meals as close to your trips as time allows. With the added protective measures of using oxygen absorbers and/or vacuum sealing, plus storing dried food away from light and heat, you can be confident that the meals you carry on your adventures will safely provide the best taste, appearance, and nutrition.
Explore: Packing & Storing Dehydrated Food.
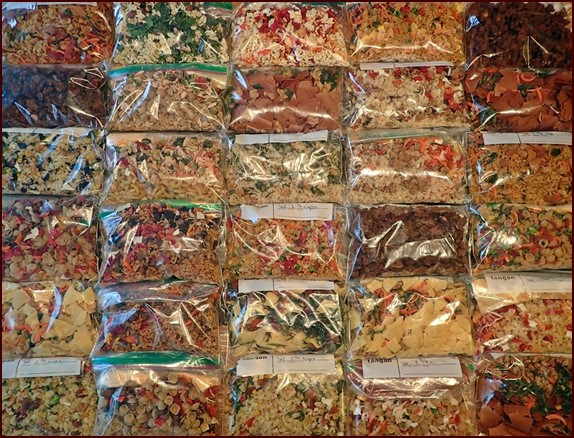
Photo: Dehydrated meals packed for the next adventure.
From The Action Guide: Dehydrating 31 Meals
Books & E-books about Dehydrating Food
Recipes for Adventure: Healthy, Hearty & Homemade Backpacking Recipes
Action Guide: Dehydrating 31 Meals
Recipes for Adventure II: The Best of Trail Bytes
Menu Planning & Food Drying Workbook
Explore More...

Backpacking Recipes using Dehydrated Food
Thermos Cooking with Dehydrated Food
Home & Trail: An Introduction to Drying Food (Free e-book)
Share this page with friends on social media.
Free E-book & Newsletter
Free with Trail Bytes subscription.
