How to Make A Camping Water Bag with a Vacuum Seal Bag
It's great when a piece of gear can be used for more than one purpose.
One day, I realized that the vacuum seal bags that I pack my daily rations in, could also be used to fetch up to three liters of extra water for the campsite. That made it easy to take sponge baths.
I cut my vacuum seal bags eleven inches wide by twelve inches deep – perfect for holding a day’s rations or three liters of water.
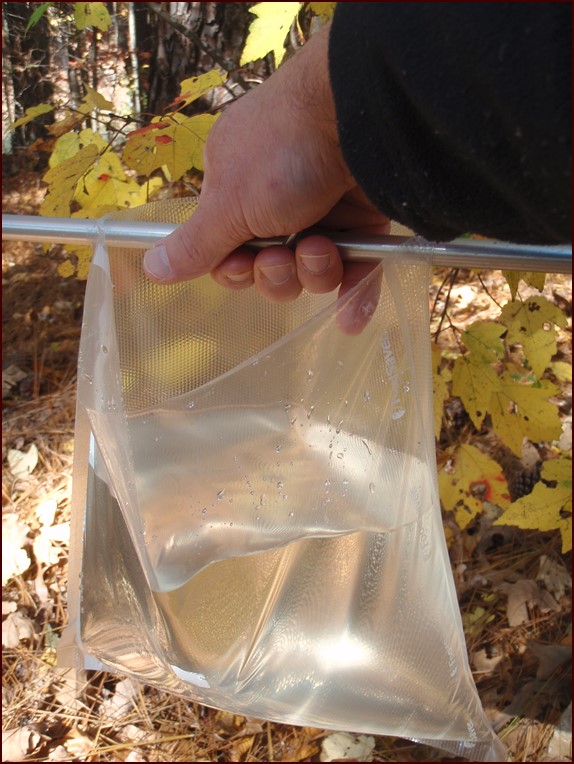
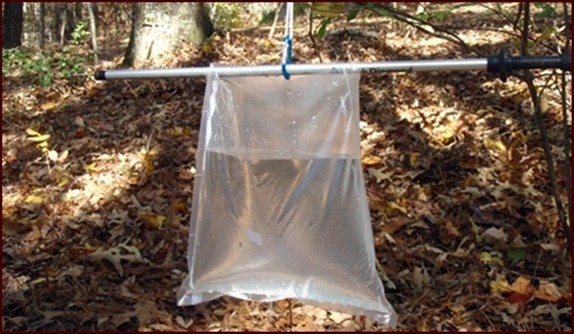
Photo shows how to carry water from the water source to the campsite using a hiking pole.
One side of a vacuum seal bag is clear plastic and the other side has mesh fiber running through it. To turn it into a camping water bag, you poke two holes in the mesh side near the outer edges and about an inch from the top. Run the top half of a hiking pole or stick through the holes to support the weight of the water. Attach a carabiner to the pole before filling with water.
The pole or stick makes it easy to hold the bag open when filling it from a water source, and comfortable to carry away to your secret bathing spot.
Three liters will fill about two-thirds of the bag. If you put much more water than that in the bag, the plastic could give way at the holes.
Pick out the spot where you want to hang your camping water bag before you go fetch the water. Run some cord over a low hanging branch and tie a loop in the end at the height that you want to hang the bag. Then all you have to do is clip the bag to the loop with the carabiner when you get back with the water. The weight of the water keeps the balance steady, and I have had no problems with the carabiner sliding away from the center.
It is easy to rig this to the end of a picnic table if you have enough space between the boards to loop a short length of cord.
With the bag full, there is plenty of room to slide your hand and a cloth in to take a mini bath. For extreme luxury, you could fill two bags – one for soaping and one for rinsing.
Explore More...

Share this page with friends on social media.


Free E-book & Newsletter

Free with Trail Bytes subscription.