6-Day Backpacking Menu & Food Drying Plan
This was my 6-day backpacking menu for a 68-mile hike on the Appalachian Trail from the Nantahala Outdoor Center in Bryson City, North Carolina to Dick’s Creek Gap in Hiawassee, Georgia.
I tracked the time it took me to dehydrate the food to give you an idea of how much time you could expect to invest in a
similar trip of your own. The time study included precooking some of the food, cutting fruit, packing, and clean-up. I didn’t count the time the food was in the dehydrator since I was free to do other things while the machine did
the work.
6-Day Backpacking Menu
Day 1 - Snacks, fruit cocktail, Tuna Mac & Cheese. I started hiking at 11:30, so I only need to pack supper and snacks.
Day 2 - Scrambled Eggs & Polenta w/ Beef, Veggies & Salsa Verde, Chicken & Rice Cacciatore, Chili, snacks, fruit cocktail.
Day 3 - Apple/Cranberry Oatmeal, Unstuffed Peppers, Cheddar Hash brown Potatoes w/ Chicken & Broccoli, snacks, fruit cocktail.
Day 4 - Scrambled Eggs & Polenta with Zucchini, Mushrooms & Cheddar Cheese Sauce, Pasta Marinara with Beef & Veggies, Mexican Beef & Rice, snacks, fruit cocktail.
Day 5 - Apple/Cranberry Oatmeal, Chili Mac, Curry Chicken & Rice, snacks, fruit cocktail.
Day 6 - Scrambled Eggs & Polenta w/ Beef, Veggies & Salsa Verde, Hash brown Potatoes & Chili, Taco Mac & Cheese w/ Chicken, snacks, fruit cocktail.
Snacks: One cup of trail mix in a snack-size Ziploc bag for each day. I varied the ingredients including almond M&Ms, yogurt covered cranberries, granola, mixed nuts, smarties (like M&M, Swiss candy), pretzel goldfish, wasabi peas.
Fruit Cocktail: One cup of mixed dried fruit which I rehydrated in the thermos for late afternoon treat.
Get the Recipes: Recipes for Adventure: Healthy, Hearty & Homemade Backpacking Recipes.
Dehydrating the Food
It took four loads in my 9-tray Excalibur Dehydrator
to dry the food for this 6-day backpacking menu: one load in the morning and one overnight for a total
of two days.
Dehydrator Load #1: Proteins plus a few Veggies
Cooked Ground Beef, Cooked Chili, Canned Tuna, Canned Chicken, Canned Beans, Steamed Peas & Broccoli.
Total prep time: 3½ hours.
I dried canned tuna, chicken, and beans, so I only had to cook the ground beef and a pot of chili. I steamed the broccoli and peas. It took 2½ hours of cooking, ½ hour tending the food while it dried, (consolidating the chicken from two trays to one tray midway and spreading out the chili to the extra tray since that was the wettest food being dried), plus ½ hour measuring and moving the dried food to bags for temporary storage.
Learn more about dehydrating meat.
Dehydrator Load #2: Starches
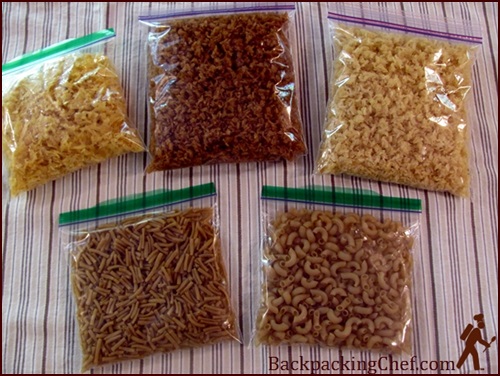
Potatoes, Rice, and Macaroni.
Total prep time: 2½ hours.
It took 2 hours to cook the starches, plus ½ hour to measure and bag the dried food.
I cooked two pots of rice in beef and chicken broth. The broth flavor remains in the dried rice, enhancing meals. I cooked two types of macaroni for variety. Precooking the macaroni ensures that it will rehydrate well in the Thermos with the addition of boiled water. I steamed and grated the potatoes.
Learn how to dehydrate grated potatoes in this back issue of my Trail Bytes newsletter.

Dehydrator Load #3: Scrambled Eggs, Sauces and Vegetables
Scrambled Eggs, Tomato Sauce, Salsa, Bell Peppers, Onions, Zucchini, Tomatoes, Mushrooms, and Carrots.
Total prep time: 4 hours
It took 3½ hours cooking plus ½ hour to measure and bag the dried food.
I cooked the polenta and then baked it with the egg mixture. As an experiment, I broiled the diced peppers, diced red onions, and julienne cut zucchini. This was a waste of time since it is fine to dry them raw. As another experiment, I sautéed the sliced mushrooms in red wine and balsamic vinegar. This added a little extra flavor, but I probably won't bother with that extra step next time. The sauces were from jars. I steamed the julienne cut carrots. Steaming carrots and broccoli before drying them gives them a nice dark color. I sliced the cherry tomatoes and dried a can of diced tomatoes.
Dehydrator Load #4: Fruit
Every day of this 6-day backpacking menu includes dried fruit.
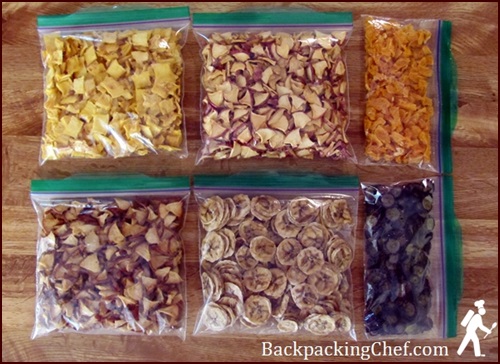
For this trip I dried 1 Pineapple, 4 Pears, 6 Apples, 5 Bananas, ½ pound seedless grapes, 3 oranges.
Total prep time: 3 hours
It took 2 hours to cut the fruit, ½ hour to measure and bag the dried fruit, and ½ hour to clean the trays.
I sliced the grapes crosswise and cut the oranges into small pieces. They were stickier than the other fruits, so I peeled them off the mesh sheets and put them back in the dehydrator for an additional four hours.
Learn more about dehydrating fruit.
Assembling the 6-Day Backpacking Menu
Total assembly and packing time: 3 hours
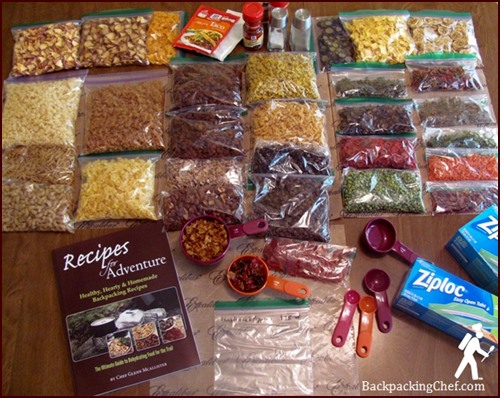
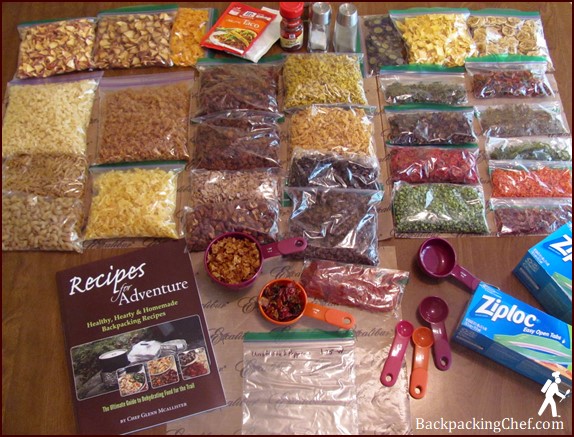
Photo above: Food ready to assemble into meals. Fruit across the top, starches left, proteins middle, vegetables on the right.
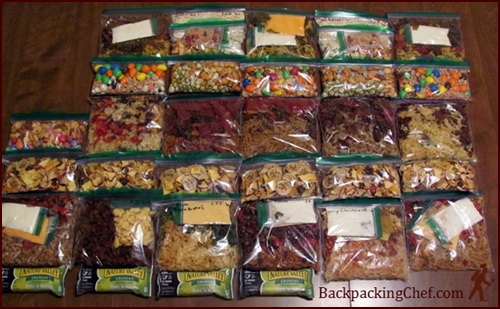
Photo above: Assembled meals packed in sandwich size bags. Snacks and fruit cocktail packed in snack size bags.
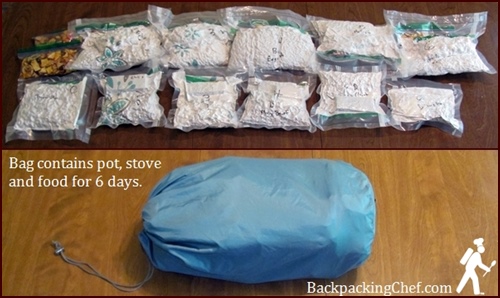
Photo above: Vacuum sealed rations packed and ready to go.
I vacuum sealed daily rations into two bags per day - breakfast, lunch and snacks in one and dinner and a snack in the other. This made the vacuum sealed bags easier to pack since I could position them better. The paper towels helped to keep sharp dried food from piercing the vacuum bags and I also used them for clean-up. Learn more about vacuum sealing.
Total food weight came in just under 9 pounds or an average of 1.5 pounds per day. I didn't have time to figure the calories, but it was plenty to eat. I would have had trouble eating any more. My snacks other than the fruit were mostly dense and heavy - nuts, chocolate, granola, etc. Seventy-five percent of the weight was in meals and twenty-five percent in snacks. I gave away my last fruit cocktail and dinner to a hungry thru-hiker since I only had four miles to go after lunch on the last day.
Thermos Cooking & Rehydration
In the past, I sometimes skipped cooking lunch on the trail because of bad weather or a desire to take a short lunch break. On this trip I used a thermos food jar to prepare hot lunches in the morning while I had my stove out during breakfast. This was simply a matter of putting the dried meal in the thermos and adding the required amount of boiled water – 25% more water than normally called for in the recipe. The hot lunches were a resounding success – delicious, fortifying, convenient and easy to clean up.
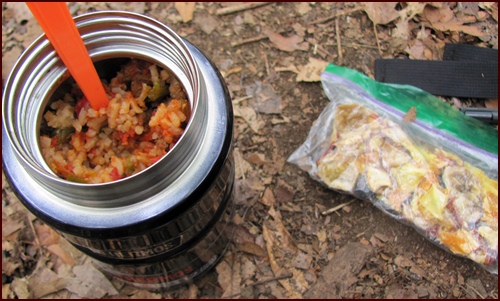
Unstuffed Peppers for lunch with a fruit cocktail on deck.
Hot Thermos Lunches: Chicken & Rice Cacciatore, Unstuffed
Peppers, Pasta Marinara with Beef & Veggies, Curry Chicken &
Rice, Hash brown Potatoes & Chili.
Fruit Cocktail:
After I cleaned the thermos after lunch – a quick shake with a small
amount of water followed by a wipe with a sheet of paper towel – I put
one cup of mixed dried fruit into the thermos and topped it off with
cold water. I opened the thermos late in the afternoon and enjoyed a
healthy, high-energy fruit cocktail consisting of a cup of sweet fruit
juice and nicely rehydrated fruit. I included one teaspoon of sugar with
the fruit.
Total prep and packing time for this 6-day backpacking menu was approximately sixteen hours. That worked out to about thirty minutes per meal counting the fruit cocktails and a few extra meals that I could assemble from the surplus of dried ingredients that I had on hand after I packed the meals for the trip.
In exchange for the time invested in preparing the meals in advance, I ate delicious meals on the trail that were hearty and nutritious. Because I dehydrated the meals, six days of food weighed only nine pounds. Vacuum sealing the food scrunched up the daily rations nice and tight for packing and kept the food well-preserved. I spent about $100 on high quality, real food.
Those benefits make it worthwhile for me to start my journey at home in the kitchen. Because I enjoy cooking and testing new techniques and recipes, I don’t consider it work. It’s fun and gives me a sense of accomplishment when the food is packed up and ready to go. As a bonus, when Dominique goes with me I get a lot of praise as we share pots of goodness together on the trail.

This hike is included in my trail journal, 1001 Miles on the Appalachian Trail.
It's free with any book purchase
More Backpacking Menus...
6-Day Backpacking Menu for Two
Menu Planning & Food Drying Workbook
Share this 6-day backpacking menu with friends on social media.
Free E-book & Newsletter
Free with Trail Bytes subscription.
Dehydrating Food from A–Z

