Backpacking Breakfasts
Improve your backpacking breakfasts with nutritious ingredients and homemade taste. In the quest for convenience and speed, many backpackers opt for instant oatmeal and grits, cold cereals, Pop-Tarts, or greasy sugar bombs like Little Debbie’s Cakes. Some folks eat no breakfast at all. You can do better!
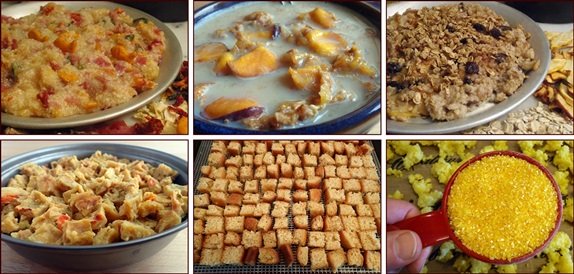
Photos: Backpacking breakfasts including Pizza Grits, Peach Crunch, Apple Cinnamon Oatmeal, Omelet Bits, Pancake Bites, and Country-Style Grits.
Instant oatmeal and grits are little more than hot slops of artificial colors, artificial flavors, sugars, and salts. In this article, I show how to upgrade these common backpacking breakfasts with fruits, vegetables, and meats.
New Backpacking Breakfasts in
Recipes for Adventure II
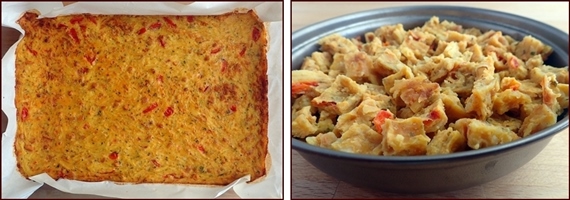
Omelet Bites, shown above, are baked in the oven and then dehydrated. Varieties include Spanish omelet with onions; ham & cheese; baked bean & tomato; broccoli & tomato; and sausage-seasoned ground beef. The secret ingredient is grated potatoes.
Recipes for Adventure II: The Best of Trail Bytes includes the new
Omelet Bites recipes, plus backpacking breakfast recipes for Canadian
Bacon Bits 'n' Grits, Pancake Bites, Cream of Pancakes, and more.
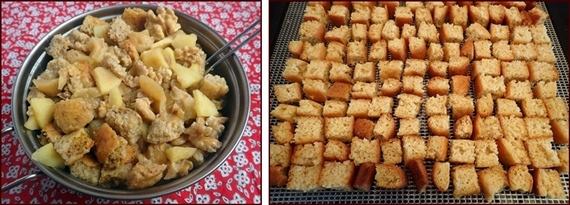
Pancake Bites, shown above, are baked in the oven and then dehydrated. On the trail, you rehydrate them with any kind of fruit. There's also a recipe for cream of pancakes which is a delicious alternative to oatmeal.
Course Grits & Quick Grits
To make the perfect pot of grits on the trail, start with plain quick-grits and dehydrated ingredients, or for a more nutritious backpacking breakfast, use courser grits that you pre-cook and dehydrate at home.
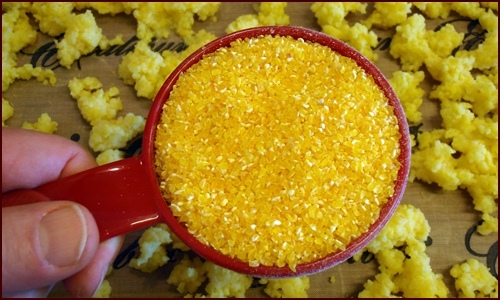
Photo: Coarsely milled yellow grits, also known as “polenta.”
Most of the nutrition is milled out of instant grits. Coarser milled grits contain more of the nutritious germ from the kernels as well as more fiber. The recipe below uses coarse milled grits.
Country-Style Grits & Sausage
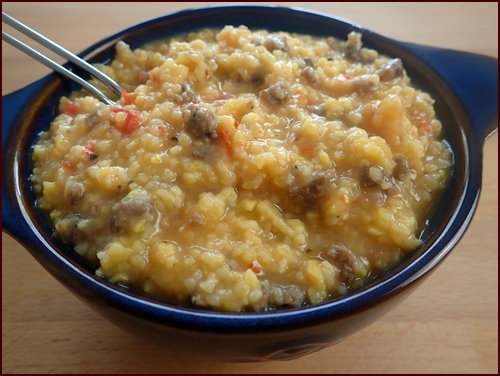
Photo: One large serving of rehydrated country-style grits and sausage.
This rustic grits recipe features course-ground yellow grits, sausage-seasoned ground beef, and tomatoes.
How to Season Ground Beef to Taste Like Breakfast Sausage
Pork sausage is too fatty to safely dehydrate and store for a backpacking trip. No problem. You can get that spicy sausage taste by cooking lean ground beef infused with sausage seasonings.
Faux Sausage Seasoning Ingredients: (per half-pound of ground beef)
- ¼ cup fine breadcrumbs or ground rolled oats
- ½ tsp. brown sugar
- ½ tsp. salt
- ½ tsp. pepper
- ¼ tsp. onion powder
- 1 tsp. dried sage
- ½ tsp. dried basil
- ⅛ tsp. dried marjoram
- ⅛ tsp. red pepper flakes
Mix ingredients in a bowl, and then work the seasonings into a half-pound of lean, raw ground beef. Form the seasoned ground beef into a big meatball and set aside for ten minutes.
Pull the meatball apart into small pieces.
Place meat in a cold, non-stick pan. Begin heating pan on medium. This allows the meat to sweat out a tiny amount of grease, so you don’t need to oil the pan.
Increase the heat to medium high, and continue cooking (about ten minutes, lots of stirring) until the meat is lightly browned and cooked through.
Cook the Grits & Combine with Cooked Ground Beef & Tomatoes
Servings: 4 Large
Ingredients:
- 2 cups yellow grits, uncooked (350 g)
- 2 cups tomatoes, diced & seasoned (300 G)
- ½ lb. ground beef, cooked and sausage-seasoned (226 grams)
Dice 3 – 4 medium tomatoes. Season lightly with herbs de Provence, salt and pepper, and onion and garlic powder. Set aside.
In a big pot, combine two cups (300 g) coarse-milled grits (not instant) with eight cups water and a teaspoon of salt. Bring to a boil, then reduce heat to low.
When most of the water has been absorbed, add the cooked ground beef and diced tomatoes. Continue cooking on low for five more minutes, adding a little extra water if necessary, then remove pot from heat.
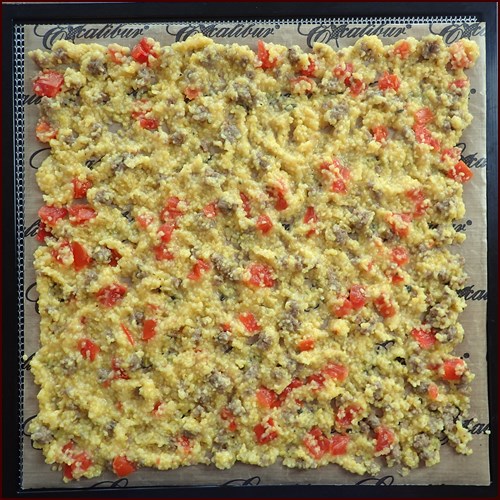
Photo: Approximately two cups cooked grits on Excalibur dehydrator try before drying.
Dehydrating Grits
Dehydrate grits for approximately 10 hours @ 145°F (57°C).
Once grits have cooled, spread thinly on dehydrator trays covered with non-stick sheets. The yield of this recipe (approximately 9½ cups) can be divided into five parts and dried on five Excalibur trays.
After six hours, grits will contract and form a solid sheet. Flip the sheet of grits over, directly onto the mesh sheet of another tray. Peel away the non-stick sheet from the bottom side, which will still be moist. Continue drying until grits are crisp and hard. Check to make sure that ground beef and tomato pieces are also dry. Break dried grits into smaller pieces for storage or packing.
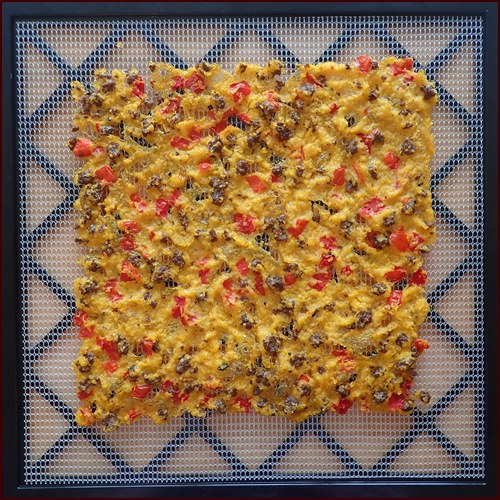
Photo: Dried sheet of grits after it was flipped over onto a mesh sheet.
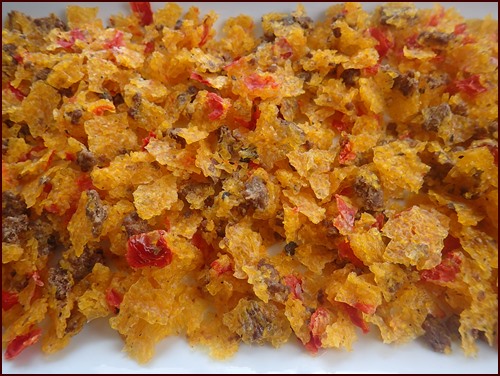
Photo: Dried grits broken into smaller pieces.
Dried Yield:
This recipe yields approximately six cups (450 g) of dried grits. Divide into four servings of one-and-a-half cups (112g) each.
Rehydrating Grits & Sausage on the Trail
Combine 1½ cups (112g) dried grits with two cups water in pot. Let soak five minutes, then light stove. Bring to a boil for one minute. Some vigorous stirring may be required to fully break down the grits. Transfer pot to an insulating cozy and wait fifteen minutes. Stir once more before serving.
Serving Suggestion: Add a few slices of cheddar cheese when serving.
Disclosure: Disclosure: As an Excalibur Dehydrator Affiliate, Backpacking Chef may earn a commission from qualifying purchases. Thank you.
More Grits Backpacking Breakfasts
These recipes combine quick grits (uncooked) with savory ingredients.
Quick grits are thirsty. To prevent scorching, add the instant grits after the water has boiled, or add boiled water to the grits in a bow.
Add cheese options after the grits have cooked.
Four Ways to Make Cheesy Grits
Goldfish Crackers. Pepperidge Farm packs those little fish with real cheddar cheese, without slipping in any artificial ingredients or partially hydrogenated oil. Crumble them up to mix in with grits, and leave a few floaters for the top.
Cheddar Cheese Powder from a box of macaroni & cheese. Use 1 – 2 tablespoons per serving of grits and pack in separate bag.
Freeze-Dried Cheddar Cheese. It's light-weight and keeps well. Stir into the grits after they have cooked and wait a few minutes for optimal cheesiness. A ¼ cup serving adds 170 calories to the meal. See the Backpacking Chef Food & Gear Guide for sources of freeze-dried cheese and cheddar cheese powder.
Real Cheddar Cheese. A small block of hard, cheddar cheese should keep for a day or two in moderate temperatures. Keep the block of cheese in its original packaging, and enclose it in a zip lock bag once opened. Cut the cheese on the trail as needed.

Photo: Pizza Grits Supreme
Pizza Grits Supreme
Serves 1
Ingredients:
- ¼ cup quick grits or ½ cup precooked and dried grits, plain
- ¼ cup (total) dried tomatoes, peppers, mushrooms, and onions
- ¼ cup dried deli ham
- 2 Tbsp. dried pineapple pieces
- ¼ cup Pepperidge Farm Pizza-Flavored Goldfish or freeze-dried cheddar cheese
- Salt and pepper to taste
- 1¼ cup water to rehydrate
At Home:
Pack goldfish in a small plastic bag and enclose with other ingredients in a larger plastic bag.
On the Trail:
Combine grits, vegetables and ham with water and soak for five minutes. Light stove, bring to boil, and cook for one more minute. Insulate pot and wait ten minutes.
Prior to serving, stir crumbled Goldfish or other cheese options into grits. If you use powdered cheese, add a little extra water.
Packing & Cooking Alternative:
If you package the grits in a separate bag, you can soak and bring the other ingredients to a boil first and then add the grits. This will make it much less likely you will have any problem with grits sticking to the bottom of the pot.
Green Grits & Ham
Serves 1
Ingredients:
- ¼ cup quick grits or ½ cup precooked and dried grits
- ¼ cup dried peas
- ¼ cup dried deli ham
- ¼ cup Pepperidge Farm Cheddar Goldfish or freeze-dried grated cheddar cheese
- Salt and pepper to taste
- 1¼ cup water to rehydrate
Pack and prepare in the same manner as Pizza Grits Supreme.
Another backpacking breakfast grits recipe:
Oatmeal Backpacking Breakfasts
The key to better oatmeal on the trail is to add dried fruits to it. Cook dried fruits in the oatmeal to soften them up, and to release some of their sweetness. Dried bananas will nearly disintegrate, while other dried fruits, apples, peaches, and berries, will hold their texture.
See: How to Dehydrate Fruit.
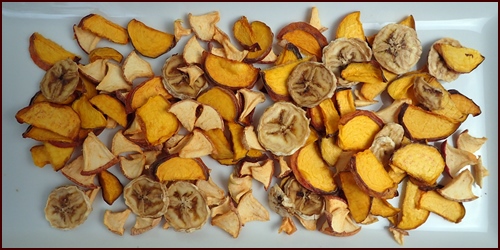
Photo: Dried peaches, bananas, and apples.
Rolled oats cook sufficiently with a minute of boiling. Stir frequently and add more water if needed to prevent scorching. Remove from stove after one minute of boiling and wait five minutes.
Another way of preparing oatmeal with fruit is to add the dried fruit to the water without the oatmeal. Add the oatmeal to the water once it starts boiling. This method eliminates any chance of scorching the bottom of the pot.
Add some crunch and extra calories to oatmeal by topping it with granola and nuts before serving.
Oatmeal goes well with Instant Dry Whole Milk. Add two tablespoons of milk powder to ½ cup water in a separate cup and stir briskly. Pour over the cooked oatmeal.
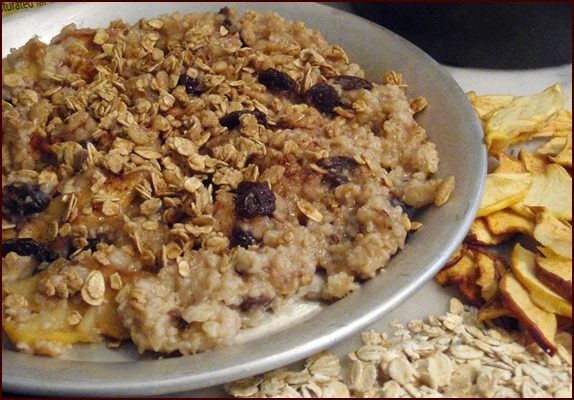
Oatmeal with Apples, Raisins & Cinnamon
Serves 1
Ingredients:
- ½ cup old-fashioned rolled oats
- ¼ cup dried apples
- ¼ cup raisins
- ¼ cup granola and/or nuts
- 1 tsp. sugar (optional)
- ½ tsp. cinnamon
- Pinch salt
- 1¼ cup water to rehydrate
Large Serving:
The recipe above has 382 calories. A ½ cup of milk on the side (2 Tbsp powdered milk) adds 76 calories.
To make a larger serving with 537 calories, use ¾ cup oats, ⅓ cup dried apples, ⅓ cup raisins, ⅓ cup granola, 1½ tsp sugar, ¾ tsp cinnamon, pinch salt, 1¾ cups water to rehydrate. A ¾ cup of milk on the side (3 Tbsp powdered milk) adds 114 calories.
The large portion is for VERY hungry hikers. Try it at home to see which portion is best for you. In Recipes for Adventure: Healthy, Hearty & Homemade Backpacking Recipes, I include the calories and ingredients for both regular and large servings for all recipes.
Oatmeal with Fruit, Nuts & Chocolate
Serves 1
Ingredients:
- ½ cup old-fashioned rolled oats
- ½ cup dried mixed fruit, any kind such as banana & mango
- ¼ cup granola with nuts & chocolate pieces
- 1 tsp. sugar (optional)
- Pinch salt
- 1½ cup water to rehydrate
At Home:
Pack milk powder, granola, and raisins in separate small bags and enclose in larger bag with other ingredients. Raisins are packed in their own bag to keep their moisture from migrating to the other ingredients.
On the Trail:
Combine all ingredients except milk powder and granola with water in pot and soak for five minutes. Light stove, bring to boil, and cook for one minute. Stir frequently and add more water if necessary. Insulate pot and wait five minutes. Top with granola.
Bircher Muesli, A Nutritious No-Cook Backpacking Breakfast
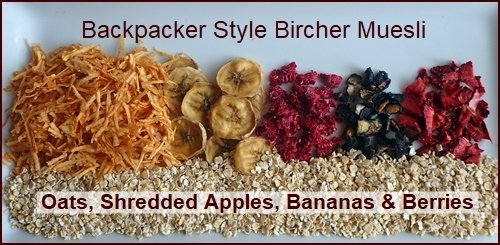
Photo: Ingredients used to make Backpacker Bircher Muesli.
Serves 1
Ingredients:
- ½ cup rolled oats (50 g)
- ½ cup dried grated apples (16 g), equivalent to 1 small apple
- ⅛ cup dried bananas (10 g), equivalent to ⅓ of a banana
- ¼ cup dried mixed berries (2-3 grams each)
- Toppings: walnut pieces, tsp. sugar, pinch cinnamon
- Optional: 4 Tbsp. powdered milk, makes 8 oz.
- 1½ cup cold water to rehydrate
Packing:
Pack oats and dried fruit in one Ziploc bag. Pack toppings and milk powder in separate bags.
On the Trail:
Combine oats and fruit with 1½ cup cold water in a sealable container such as a thermos food jar. Soak overnight to enjoy muesli for breakfast, or soak it while you walk for an hour or two, if you want to eat it later in the day. When serving, top with walnut pieces, sugar to taste, and a pinch of cinnamon. Add mixed up powdered milk if desired.
More Backpacking Breakfast Ideas

Photo: Peach Crunch Breakfast.
Peach Perfect Backpacking Breakfasts
- Peach Crunch Breakfast
- Hot Peach Crumble
- Peach Granola Clusters
- Peach Perfect Trail Mix
- Peachy Fruit Cocktail
Explore these peachy backpacking breakfasts here: Dehydrating Peaches.
Backpacking Breakfasts in Trail Bytes
Get a free, 50-page e-book, Home & Trail: An Introduction to Drying Food, when you subscribe to Chef Glenn's newsletter.
Oat Bark
Cook oatmeal with fruit at home, run it through a blender, and dry it into a sheet of bark. Break oat bark into smaller pieces for the trail. This is great for folks who want to hit the trail fast. You can snack on your dried oat bark while you walk.
Overnight Oatmeal
With a thermos food jar, you can prepare your oatmeal before you go to sleep. It will save you time in the morning.
Scrambled Eggs Backpacking Breakfast
Freeze Dried Scrambled Eggs
One way to add eggs to the breakfast menu is to purchase freeze-dried scrambled eggs. These are precooked and freeze-dried at the factory, so all you have to do is add water and heat them up. Some come with additional meat and/or vegetables, but you could also add your own. The drawback is that these meals can be expensive.
Fresh Eggs
I have never carried fresh eggs on the trail due to the weight, bulk and potential for a mess, but if one is willing to take on the weight (4 eggs weigh about nine ounces) and risk, I recommend hard boiling as the easiest preparation method. All you have to do is place the eggs in your pot with water, boil for two minutes, and then cozy the pot for another ten minutes. The hot water could have a second use to prepare grits or tea. Make this your first breakfast on the trail. This is a viable option for three or four thru-hikers to split a dozen eggs and get some much needed fat and protein on the first morning after a stop in town for resupply.
Dehydrating Eggs
Dehydrating scrambled or hard boiled eggs does not work. They do not rehydrate well and remain hard as rock. However, you can make hybrid scrambled eggs by baking them with cooked polenta before drying.
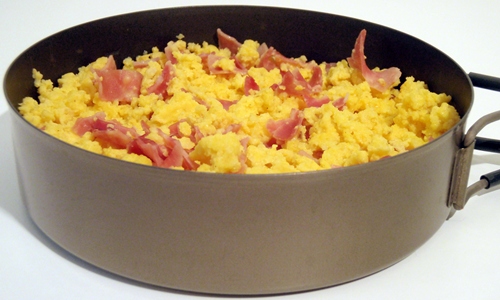
Photo: Rehydrated Scrambled Eggs & Ham
The result is something very close – but not exactly the same, as scrambled eggs and they rehydrate well due to the absorbing quality of the polenta. I use polenta because the yellow color matches the eggs, but regular grits work also.
Pack the dried scrambled polenta eggs into individual servings with dried meats, vegetables, salsa leather, and freeze-dried cheese. Create a variety of backpacking breakfasts by combining different meats and vegetables with the eggs.
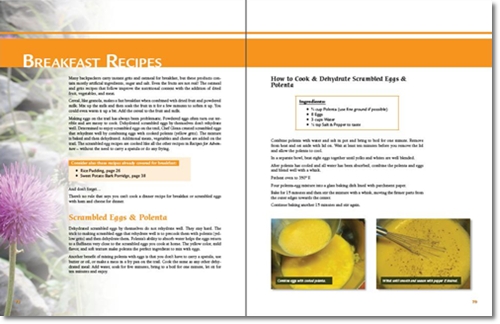
The instructions for making and drying scrambled eggs and polenta are in my book, Recipes for Adventure: Healthy, Hearty & Homemade Backpacking Recipes.
From the Mail Bag: "The scrambled eggs recipe in your book is PURE GENIUS. I am looking so forward to eggs for breakfast while on the trail!" –Anna
Share this page with friends on social media.
Free E-book & Newsletter
Free with Trail Bytes subscription.
Dehydrating Food from A–Z

